
Nutter Butter Ghosts were one of the things I looked forward to most as a kid when Halloween rolled around. My mom and I would make them pretty much every year and they were always really fun to make and super tasty to eat. They appealed to me especially since I've never been much of a candy person to be honest. I have a few favorites, but overall I could care less. My sister and I used to go trick or treating, mom and dad would look through all of the candy to make sure it wasn't 'tampered with' and then we would negotiate trades and retreat to our corner or the living room to eat a few pieces and then put the rest back in our bucket. I would always put mine in my closet the next day --and there it would sit until the next Halloween when I would pull it out, dump all of the old candy out, and start anew.
I know. A huge waste on my part, but mom always had bowls of candy around the house when I was growing up so it never felt forbidden or exciting or anything. It was just candy. No big deal.
Now when friends would come over, it was completely different. The bowls of candy would be emptied within a few hours. Ryan's eyes would glaze over and he would gorge himself anytime he visited. He stopped doing that when it eventually caused him some srs tummy troubles (haha).
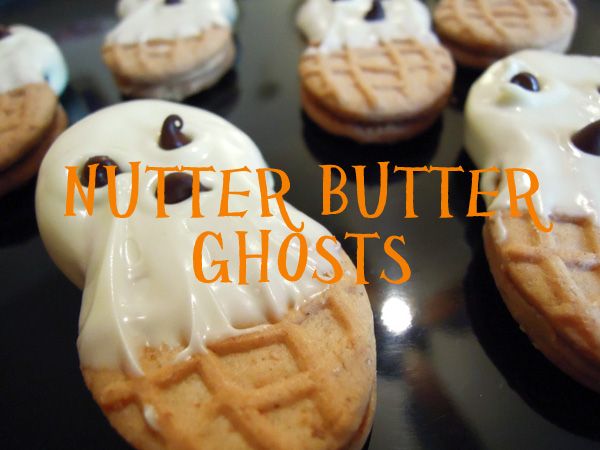
But onto the ghost cookies, it's a super simple recipe (is this even considered a recipe??) but it's really effective if you're wanting a simple treat for a Halloween party.
What you'll need:
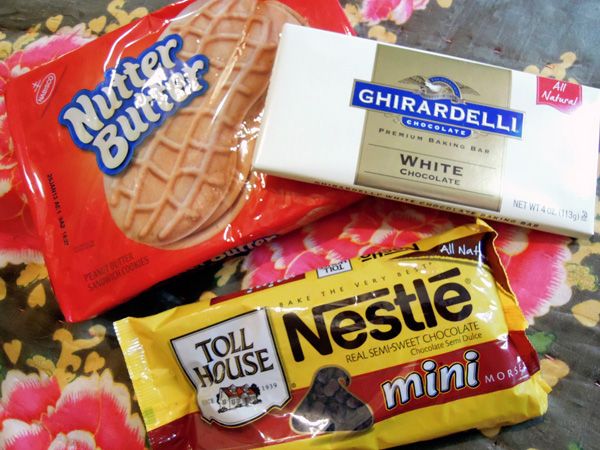
- bag of Nutter Butters
- melt-able brick of white chocolate (I used the whole thing and it made enough to cover about 12 cookies)
- mini chocolate chips (optional reg size chocolate chips)
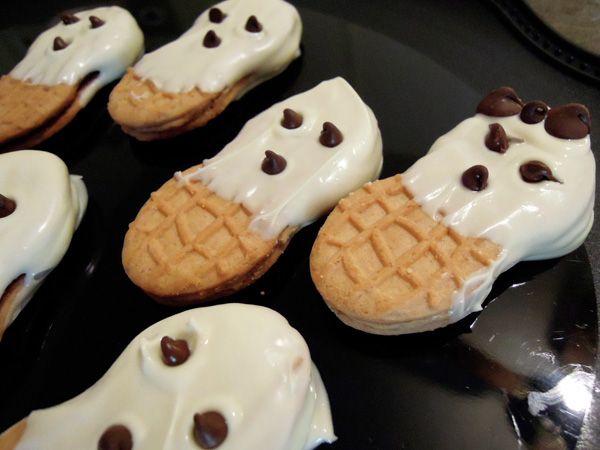
1. Melt your white chocolate in a double broiler or in a bowl over a pot with some water in it. You could also just microwave it but it won't stay melty and it'll get clumpy if you over -heat it in the microwave.
2. Dip your Nutter Butter cookie in 3/4 of the way, leaving space at the bottom so it looks like it's wearing a little sheet.
3. Apply chocolate chips for the eyes and mouth before the white chocolate cools.
**Use a combination of regular and mini chocolate chips to create a bow on your ghosts like I did below-- I even angled her chocolate chip eyes to look like cat eye flicks haha!
4. Let dry on cooling rack
5. Serve when completely dry and cool.
Tah Dah!
I told you it was super simple. I feel stupid even typing out the instructions for it, haha.
Anyways, hope you enjoy them! Keep a lookout for my other holiday diy stuff coming up.
-Becca